Introduction
This guide explains how to create alerts on TradingView with Quantum Trading indicators. You can take advantage of TradingView’s extensive Alert creation system to notify you of events in your chart. Predefined conditions or triggers have been defined in our indicators that allow you to easily setup Alerts that would otherwise require more steps to create. All available alert conditions for each indicator are explained in their respective support page but you can use this guide to learn how to select these conditions when creating your own Alerts in TradingView.
For demonstration purposes, the Quantum Tick Volumes indicator will be used as an example.
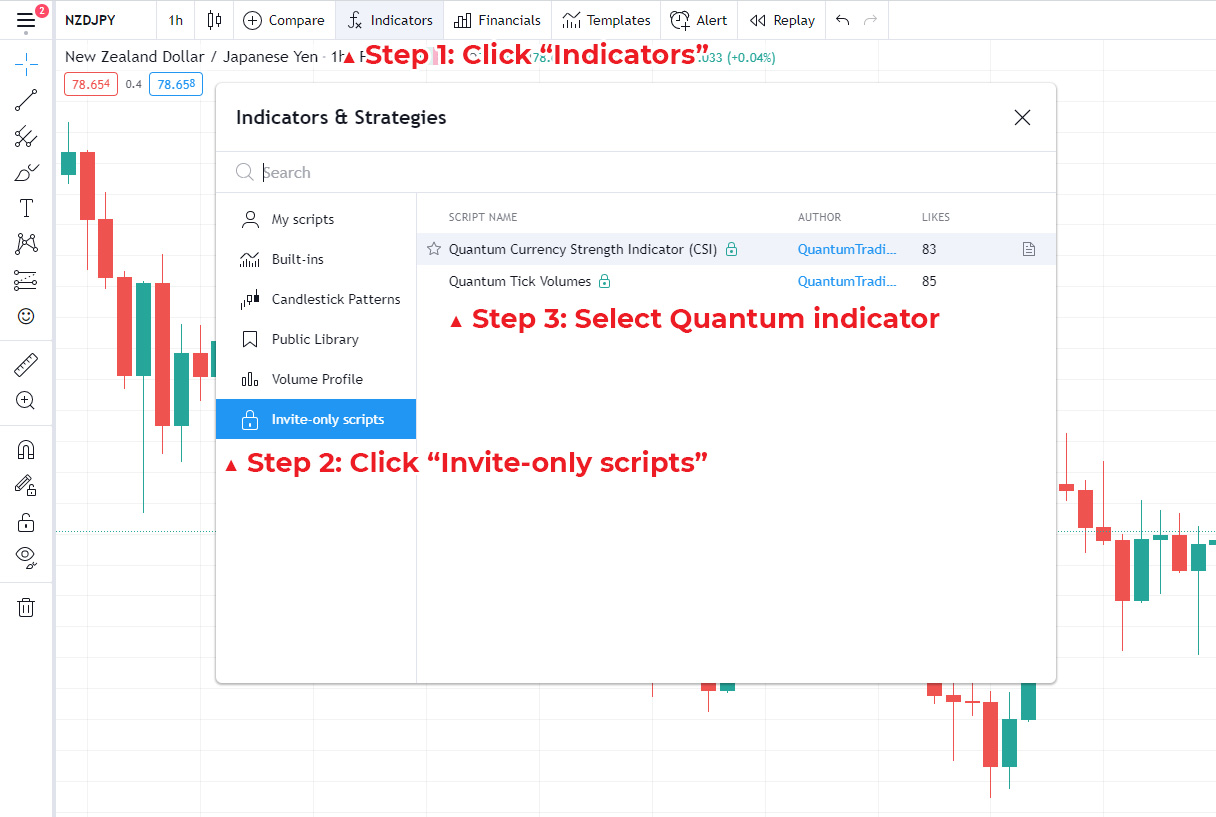
Step 1: Add the indicator in your chart
To start creating Alerts triggered by an indicator, you must first add the indicator in your chart. Using the Quantum Tick Volumes as an example, in your chart page’s tool bar click Indicators then select the indicator you need and add it to your chart. For Quantum Tick Volumes, you can find it in the Invite-only scripts tab of the Indicators & Strategies window.
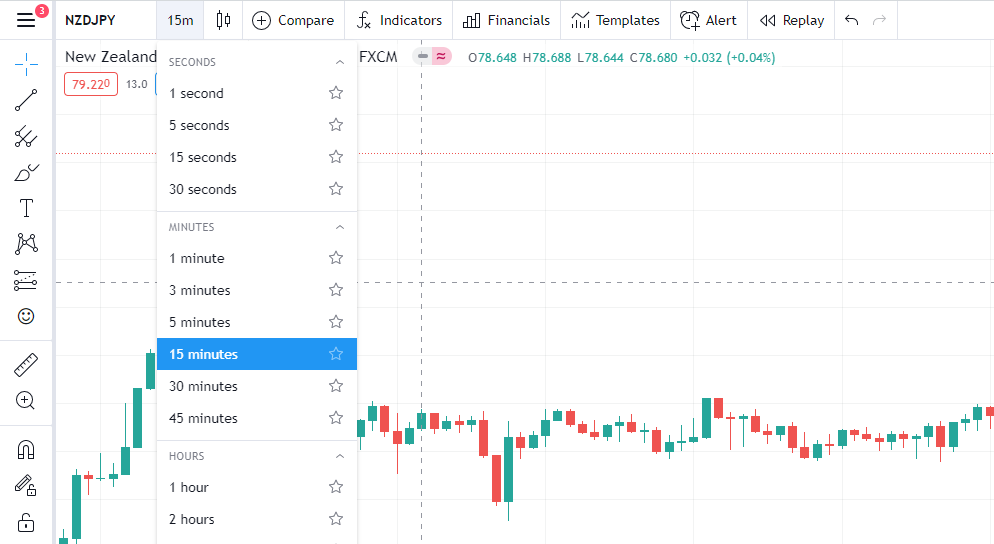
Step 2: Choose your desired timeframe
TradingView Alerts are created within the context of the chart’s current timeframe. Please set the timeframe of your chart where you need the indicator to send Alerts from. Following the example, create an Alert using the 15 minute timeframe.
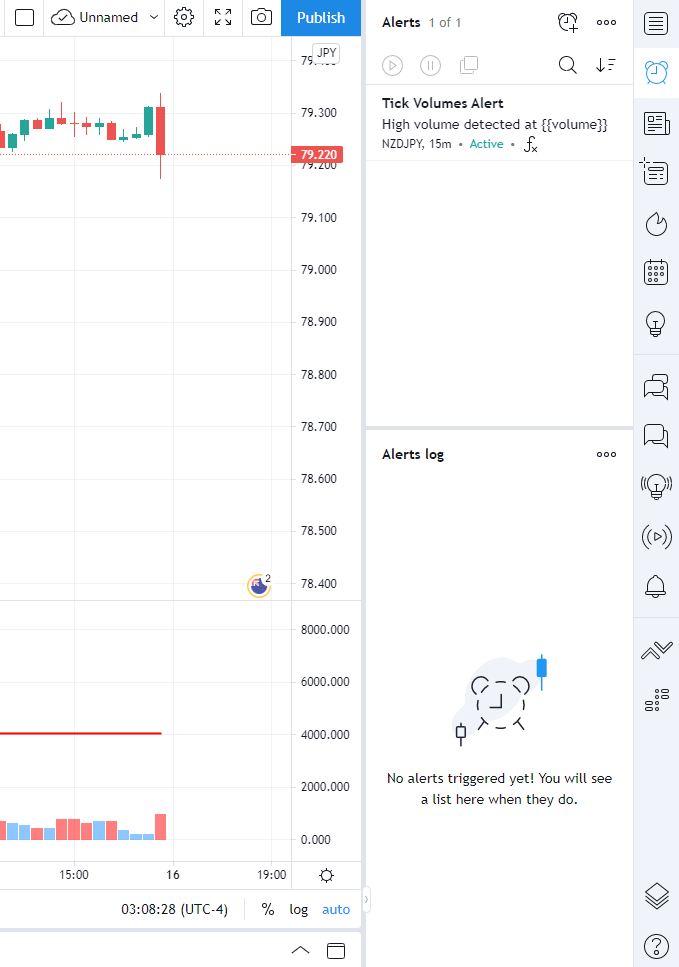
Step 3: Open the Alerts panel and window
You can find the Alerts panel at the right hand side of the chart page. If this is not immediately visible, please click the Alerts button which has an alarm clock icon at the right-hand side menu of the chart page. Once open, please click the Create alert button to display the Alerts window.
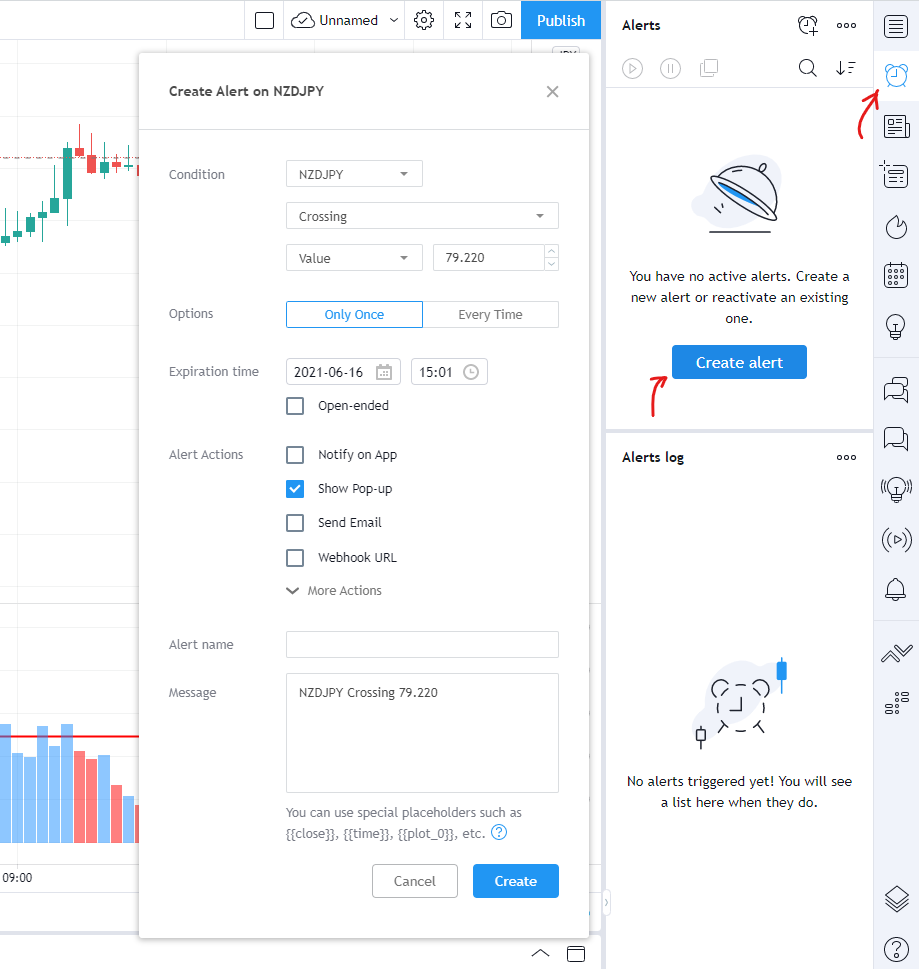
Step 4: Select the Condition (and set the alert options)
The Create Alert window opens which is where you will define your alert and its various options. Focus your attention on the Condition options. The first box allows you to select the source of the alert and because you are creating an alert for an indicator that is currently active in your chart, click this box and select that indicator. You will not find indicators here that are not currently running in your chart. Continuing with the example, select the Quantum Tick Volumes indicator.
The second box below allows you to select the condition associated with the source you selected. Clicking this box displays a list of conditions which is divided into 2. The first half lists the predefined conditions of the indicator while the second half is for standard conditions that you will find in most indicator plots. For Quantum Tick Volumes, there is only 1 alert condition called “High Volume” but you will find that other indicators will have more predefined conditions listed here.
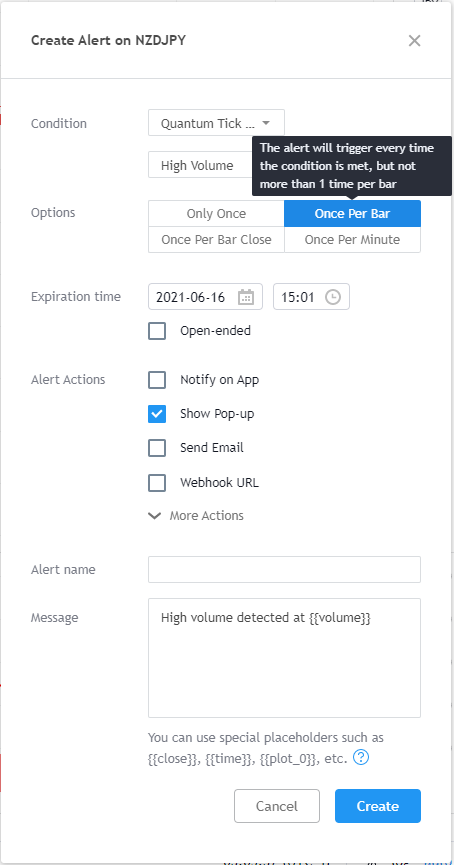
Other options
Other options allow you to set other parameters that affect the Alert’s method of delivery. Once you are satisfied with your settings, please click Create at the bottom of the window.
Options (frequency)
You can select how often you like to be notified every time the Alert is triggered.
Expiration time
This option enables you to set the date and time when the Alert should stop or if you like to keep its run time open-ended.
Alert actions
You can select here how you want to be notified when the Alert is triggered.
Alert name
This allows you to put a custom name for your Alert.
Message
Predefined alerts have default messages that they display when they are triggered. You can edit these messages using this option.
Step 5: Monitoring alerts
You can keep track of all your Alert notifications in the Alerts log located at the bottom half of the Alerts panel.